Calendars
Contents
Calendars are entities within the program that define the working capacity of resources. A calendar consists of a series of days throughout the year, with each day divided into available working hours.
For example, a public holiday might have 0 available working hours. Conversely, a typical workday might have 8 hours designated as available working time.
There are two primary ways to define the number of working hours in a day:
- By Weekday: This method sets a standard number of working hours for each day of the week. For example, Mondays might typically have 8 working hours.
- By Exception: This method allows for specific deviations from the standard weekday schedule. For example, Monday, January 30th, might have 10 working hours, overriding the standard Monday schedule.
Calendar Administration
The calendar system is hierarchical, allowing you to create base calendars and then derive new calendars from them, forming a tree structure. A calendar derived from a higher-level calendar will inherit its daily schedules and exceptions unless explicitly modified. To effectively manage calendars, it's important to understand the following concepts:
- Day Independence: Each day is treated independently, and each year has its own set of days. For example, if December 8th, 2009, is a public holiday, this does not automatically mean that December 8th, 2010, is also a public holiday.
- Weekday-Based Working Days: Standard working days are based on weekdays. For example, if Mondays typically have 8 working hours, then all Mondays in all weeks of all years will have 8 available hours unless an exception is defined.
- Exceptions and Exception Periods: You can define exceptions or exception periods to deviate from the standard weekday schedule. For example, you can specify a single day or a range of days with a different number of available working hours than the general rule for those weekdays.
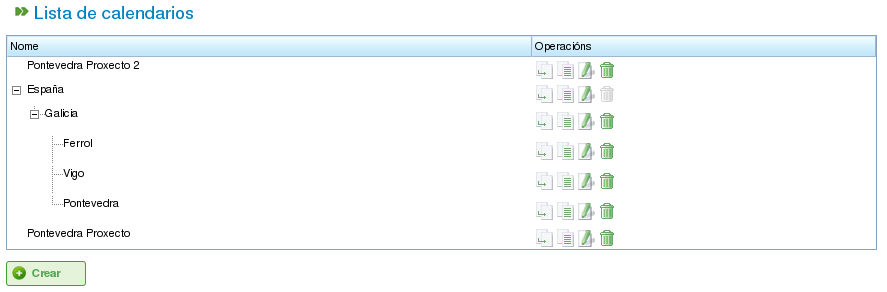
Calendar Administration
Calendar administration is accessible through the "Administration" menu. From there, users can perform the following actions:
- Create a new calendar from scratch.
- Create a calendar derived from an existing one.
- Create a calendar as a copy of an existing one.
- Edit an existing calendar.
Creating a New Calendar
To create a new calendar, click the "Create" button. The system will display a form where you can configure the following:
- Select the Tab: Choose the tab you want to work on:
- Marking Exceptions: Define exceptions to the standard schedule.
- Working Hours per Day: Define the standard working hours for each weekday.
- Marking Exceptions: If you select the "Marking Exceptions" option, you can:
- Select a specific day on the calendar.
- Select the type of exception. The available types are: holiday, illness, strike, public holiday, and working holiday.
- Select the end date of the exception period. (This field does not need to be changed for single-day exceptions.)
- Define the number of working hours during the days of the exception period.
- Delete previously defined exceptions.
- Working Hours per Day: If you select the "Working Hours per Day" option, you can:
- Define the available working hours for each weekday (Monday, Tuesday, Wednesday, Thursday, Friday, Saturday, and Sunday).
- Define different weekly hour distributions for future periods.
- Delete previously defined hour distributions.
These options allow users to fully customize calendars according to their specific needs. Click the "Save" button to store any changes made to the form.
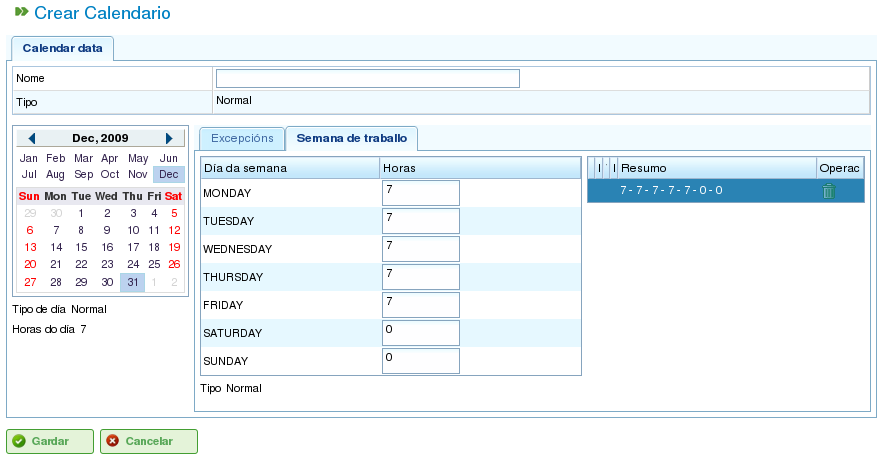
Editing Calendars
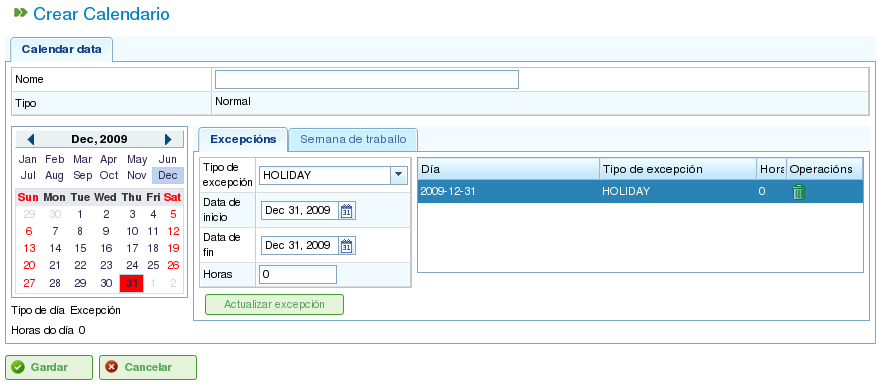
Adding an Exception to a Calendar
Creating Derived Calendars
A derived calendar is created based on an existing calendar. It inherits all the features of the original calendar, but you can modify it to include different options.
A common use case for derived calendars is when you have a general calendar for a country, such as Spain, and you need to create a derived calendar to include additional public holidays specific to a region, such as Galicia.
It's important to note that any changes made to the original calendar will automatically propagate to the derived calendar, unless a specific exception has been defined in the derived calendar. For example, the calendar for Spain might have an 8-hour working day on May 17th. However, the calendar for Galicia (a derived calendar) might have no working hours on that same day because it's a regional public holiday. If the Spanish calendar is later changed to have 4 available working hours per day for the week of May 17th, the Galician calendar will also change to have 4 available working hours for every day in that week, except for May 17th, which will remain a non-working day due to the defined exception.
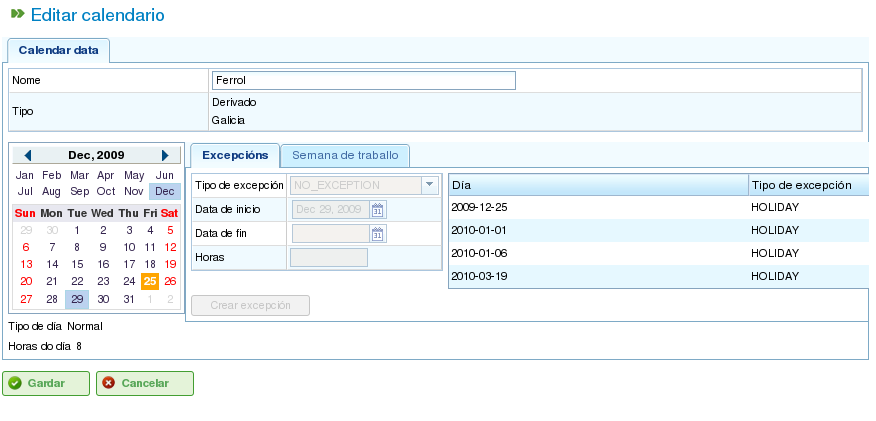
Creating a Derived Calendar
To create a derived calendar:
- Go to the Administration menu.
- Click the Calendar administration option.
- Select the calendar you want to use as the basis for the derived calendar and click the "Create" button.
- The system will display an editing form with the same characteristics as the form used to create a calendar from scratch, except that the proposed exceptions and the working hours per weekday will be based on the original calendar.
Creating a Calendar by Copying
A copied calendar is an exact duplicate of an existing calendar. It inherits all the features of the original calendar, but you can modify it independently.
The key difference between a copied calendar and a derived calendar is how they are affected by changes to the original. If the original calendar is modified, the copied calendar remains unchanged. However, derived calendars are affected by changes made to the original, unless an exception is defined.
A common use case for copied calendars is when you have a calendar for one location, such as "Pontevedra," and you need a similar calendar for another location, such as "A Coruña," where most of the features are the same. However, changes to one calendar should not affect the other.
To create a copied calendar:
- Go to the Administration menu.
- Click the Calendar administration option.
- Select the calendar you want to copy and click the "Create" button.
- The system will display an editing form with the same characteristics as the form used to create a calendar from scratch, except that the proposed exceptions and the working hours per weekday will be based on the original calendar.
Default Calendar
One of the existing calendars can be designated as the default calendar. This calendar will be automatically assigned to any entity in the system that is managed with calendars unless a different calendar is specified.
To set up a default calendar:
- Go to the Administration menu.
- Click the Configuration option.
- In the Default calendar field, select the calendar you want to use as the program's default calendar.
- Click Save.
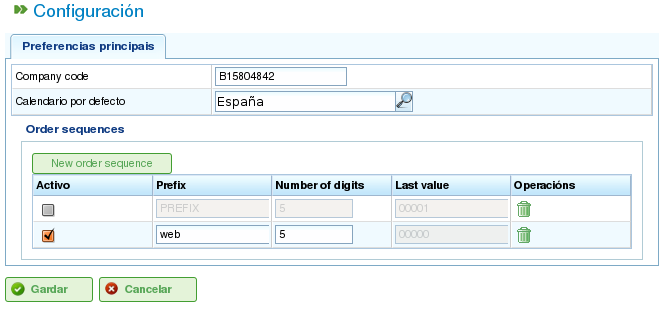
Setting a Default Calendar
Assigning a Calendar to Resources
Resources can only be activated (i.e., have available working hours) if they have an assigned calendar with a valid activation period. If no calendar is assigned to a resource, the default calendar is assigned automatically, with an activation period that begins on the start date and has no expiry date.
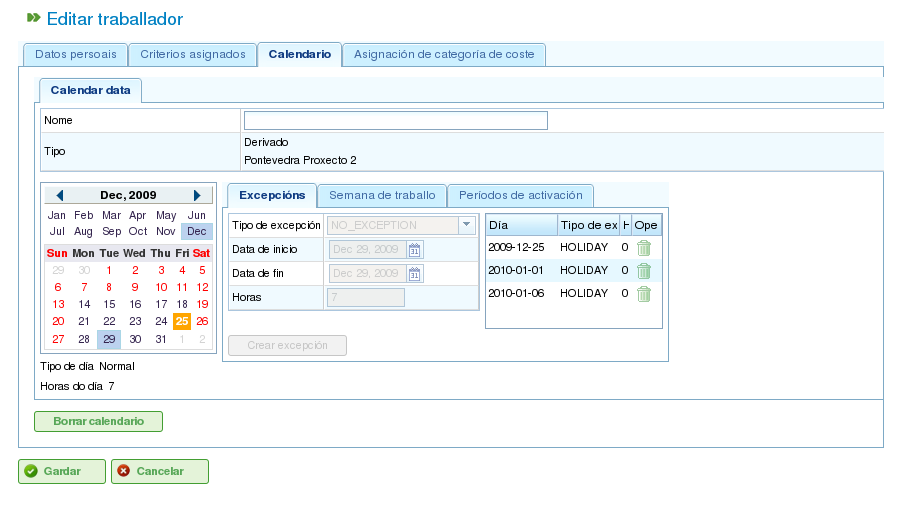
Resource Calendar
However, you can delete the calendar that has been previously assigned to a resource and create a new calendar based on an existing one. This allows for complete customization of calendars for individual resources.
To assign a calendar to a resource:
- Go to the Edit resources option.
- Select a resource and click Edit.
- Select the "Calendar" tab.
- The calendar, along with its exceptions, working hours per day, and activation periods, will be displayed.
- Each tab will have the following options:
- Exceptions: Define exceptions and the period to which they apply, such as holidays, public holidays, or different workdays.
- Working Week: Modify the working hours for each weekday (Monday, Tuesday, etc.).
- Activation Periods: Create new activation periods to reflect the start and end dates of contracts associated with the resource. See the following image.
- Click Save to store the information.
- Click Delete if you want to change the calendar assigned to a resource.
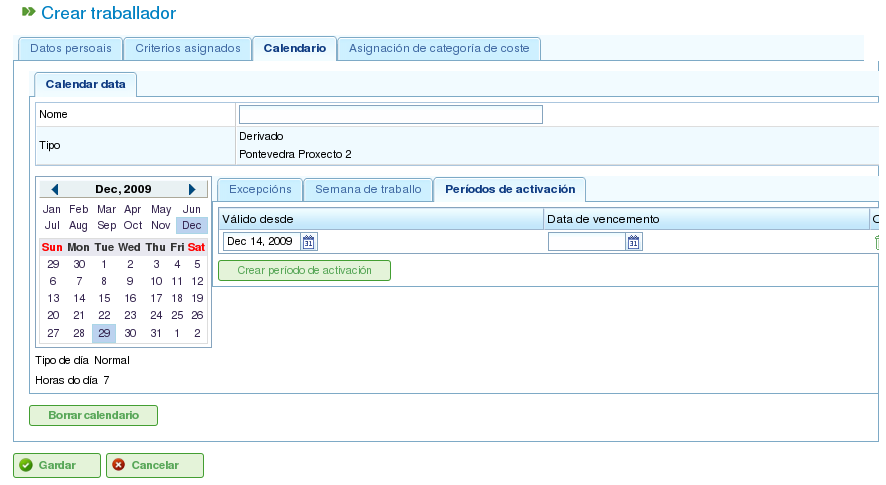
Assigning a New Calendar to a Resource
Assigning Calendars to Projects
Projects can have a different calendar than the default calendar. To change the calendar for a project:
- Access the project list in the company overview.
- Edit the project in question.
- Access the "General information" tab.
- Select the calendar to be assigned from the drop-down menu.
- Click "Save" or "Save and continue."
Assigning Calendars to Tasks
Similar to resources and projects, you can assign specific calendars to individual tasks. This allows you to define different calendars for specific stages of a project. To assign a calendar to a task:
- Access the planning view of a project.
- Right-click the task to which you want to assign a calendar.
- Select the "Assign calendar" option.
- Select the calendar to be assigned to the task.
- Click Accept.